
In this tutorial, we are going to install FlareVM; a freely available and open-sourced Windows-based security distribution designed for:
- Reverse engineers
- Malware analysts
- Incident responders
- Penetration testers.
Even if no one prevents us to install it into our main system, the usual way to set up our lab is to install it on a Virtual Machine (Windows 7+ with at least 60GB of hard drive and 2GB RAM) so that malware cannot damage the system (Here is the guide on how to install Virtualbox).
Since this blog aims to be resolutely practical I strongly suggest you have this ready-to-use VM that can be both a malware analysis and exploit development lab.
Get the files
Without wasting any more time, we can get straight to the point and install FlareVM.
Keeping in mind that the entire process can require a lot (it depends on your connection speed), let’s start:
The first step is going to the official repository at https://github.com/mandiant/flare-vm from your guest machine, click ‘Code’, and select ‘Download Zip’. (You can also clone the repository with git if you already have it in your VM).

After that, you will have a zipped folder among your downloads, so extract its content by right-clicking and “Extract all”:
At this point you should see the following screen, just click on “Extract”.

Optionally you can move the entire folder into a more comfortable place like directly under “C:\”.
Running the script
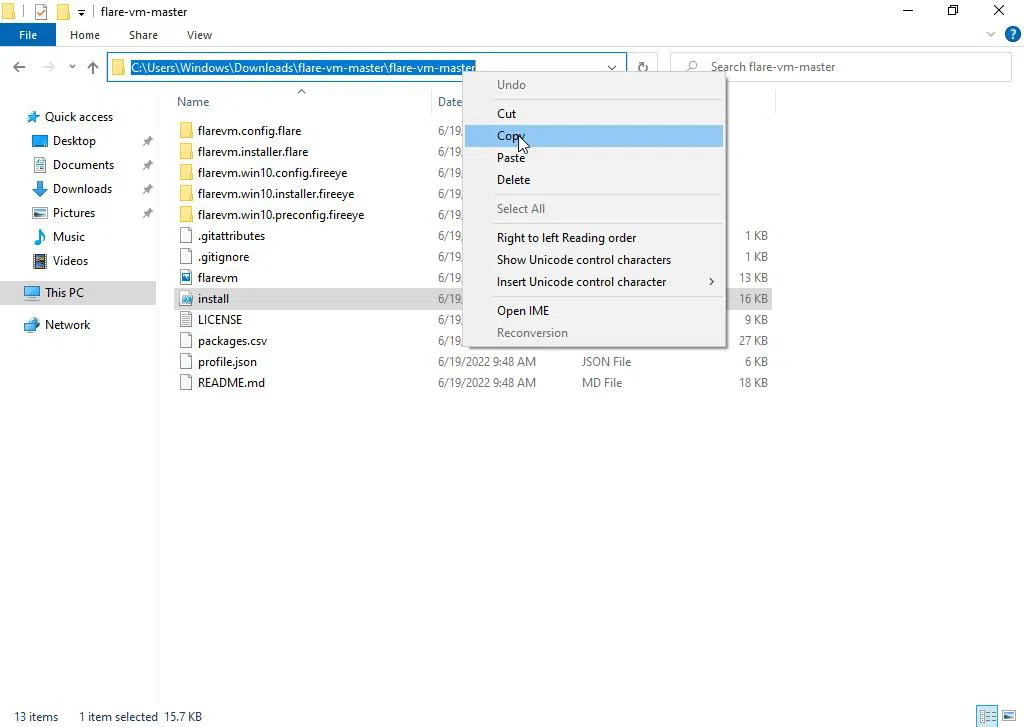
Among the files in the repository, there is a script named “install”, it will do the whole work for us, so let’s see how we can launch it.
Now we have found it, we need to copy the full path of the install script as the image below is showing.
Once we have done everything, the next step is to go to the Start button, search for ‘Windows Powershell’ and select ‘Run as administrator’.
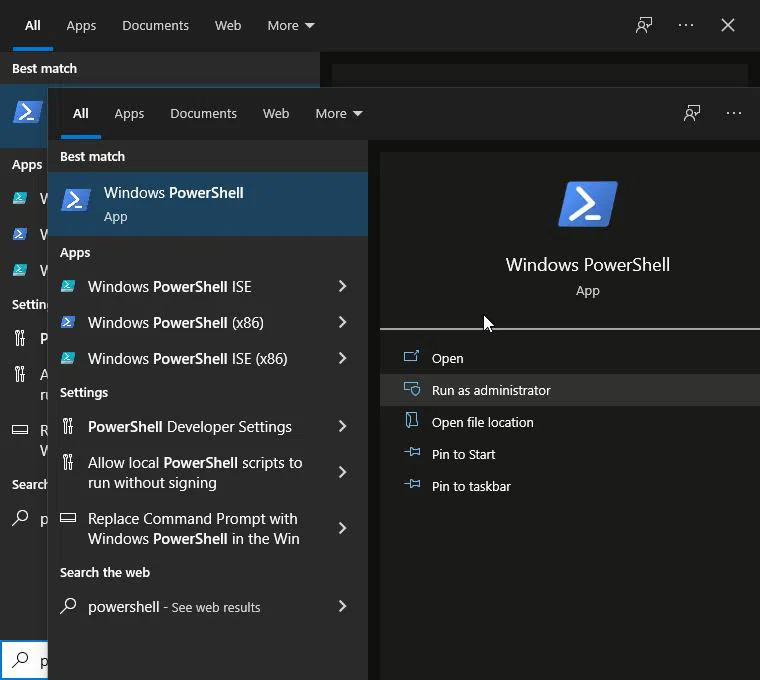
Once Powershell is working, type ‘cd’ and paste the copied path, and hit Enter!! It changes the current working directory into the one of FlareVM.

Now, type ‘Set-ExecutionPolicy unrestricted’ and hit Enter.
The system will ask you for confirmation for changing the execution policy, so type ‘Y’ and hit enter.
It’s time to run the script, so type “.\install.ps1” (only bold part, no quotation marks) and hit Enter.
At this point, it will ask again for confirmation if you want to run the untrusted script, you just need to press the “R” key and Enter.
After that click ‘Y’ when it asks for confirmation to continue if disk space is less than 40GB.

The installation process will start automatically. It may take 1 – 3 hours for installation.
The final result
When the process of FlareVM installation is complete you can notice some differences:
- The Desktop Wallpaper is changed with the FlareVM’s Logo
- The desktop has a folder named “FLARE” which contains almost all the free tools you are going to use in your cybersecurity career.


